
How to Make Tiramisu in a Large Tray (Perfect for Parties & Catering)
How to Make Tiramisu in a Large Tray (Perfect for Parties & Catering)
Tiramisu is one of the most popular desserts for events, parties, and catering because it is easy to prepare in large quantities and looks beautiful when served as a slab dessert.
Making tiramisu in a large tray allows you to create clean layers of coffee-soaked biscuits, mascarpone cream, and cocoa powder that can be sliced and served easily.
Using a purpose-built tiramisu tray also helps keep the dessert structured and makes transport and presentation much easier for catering setups.
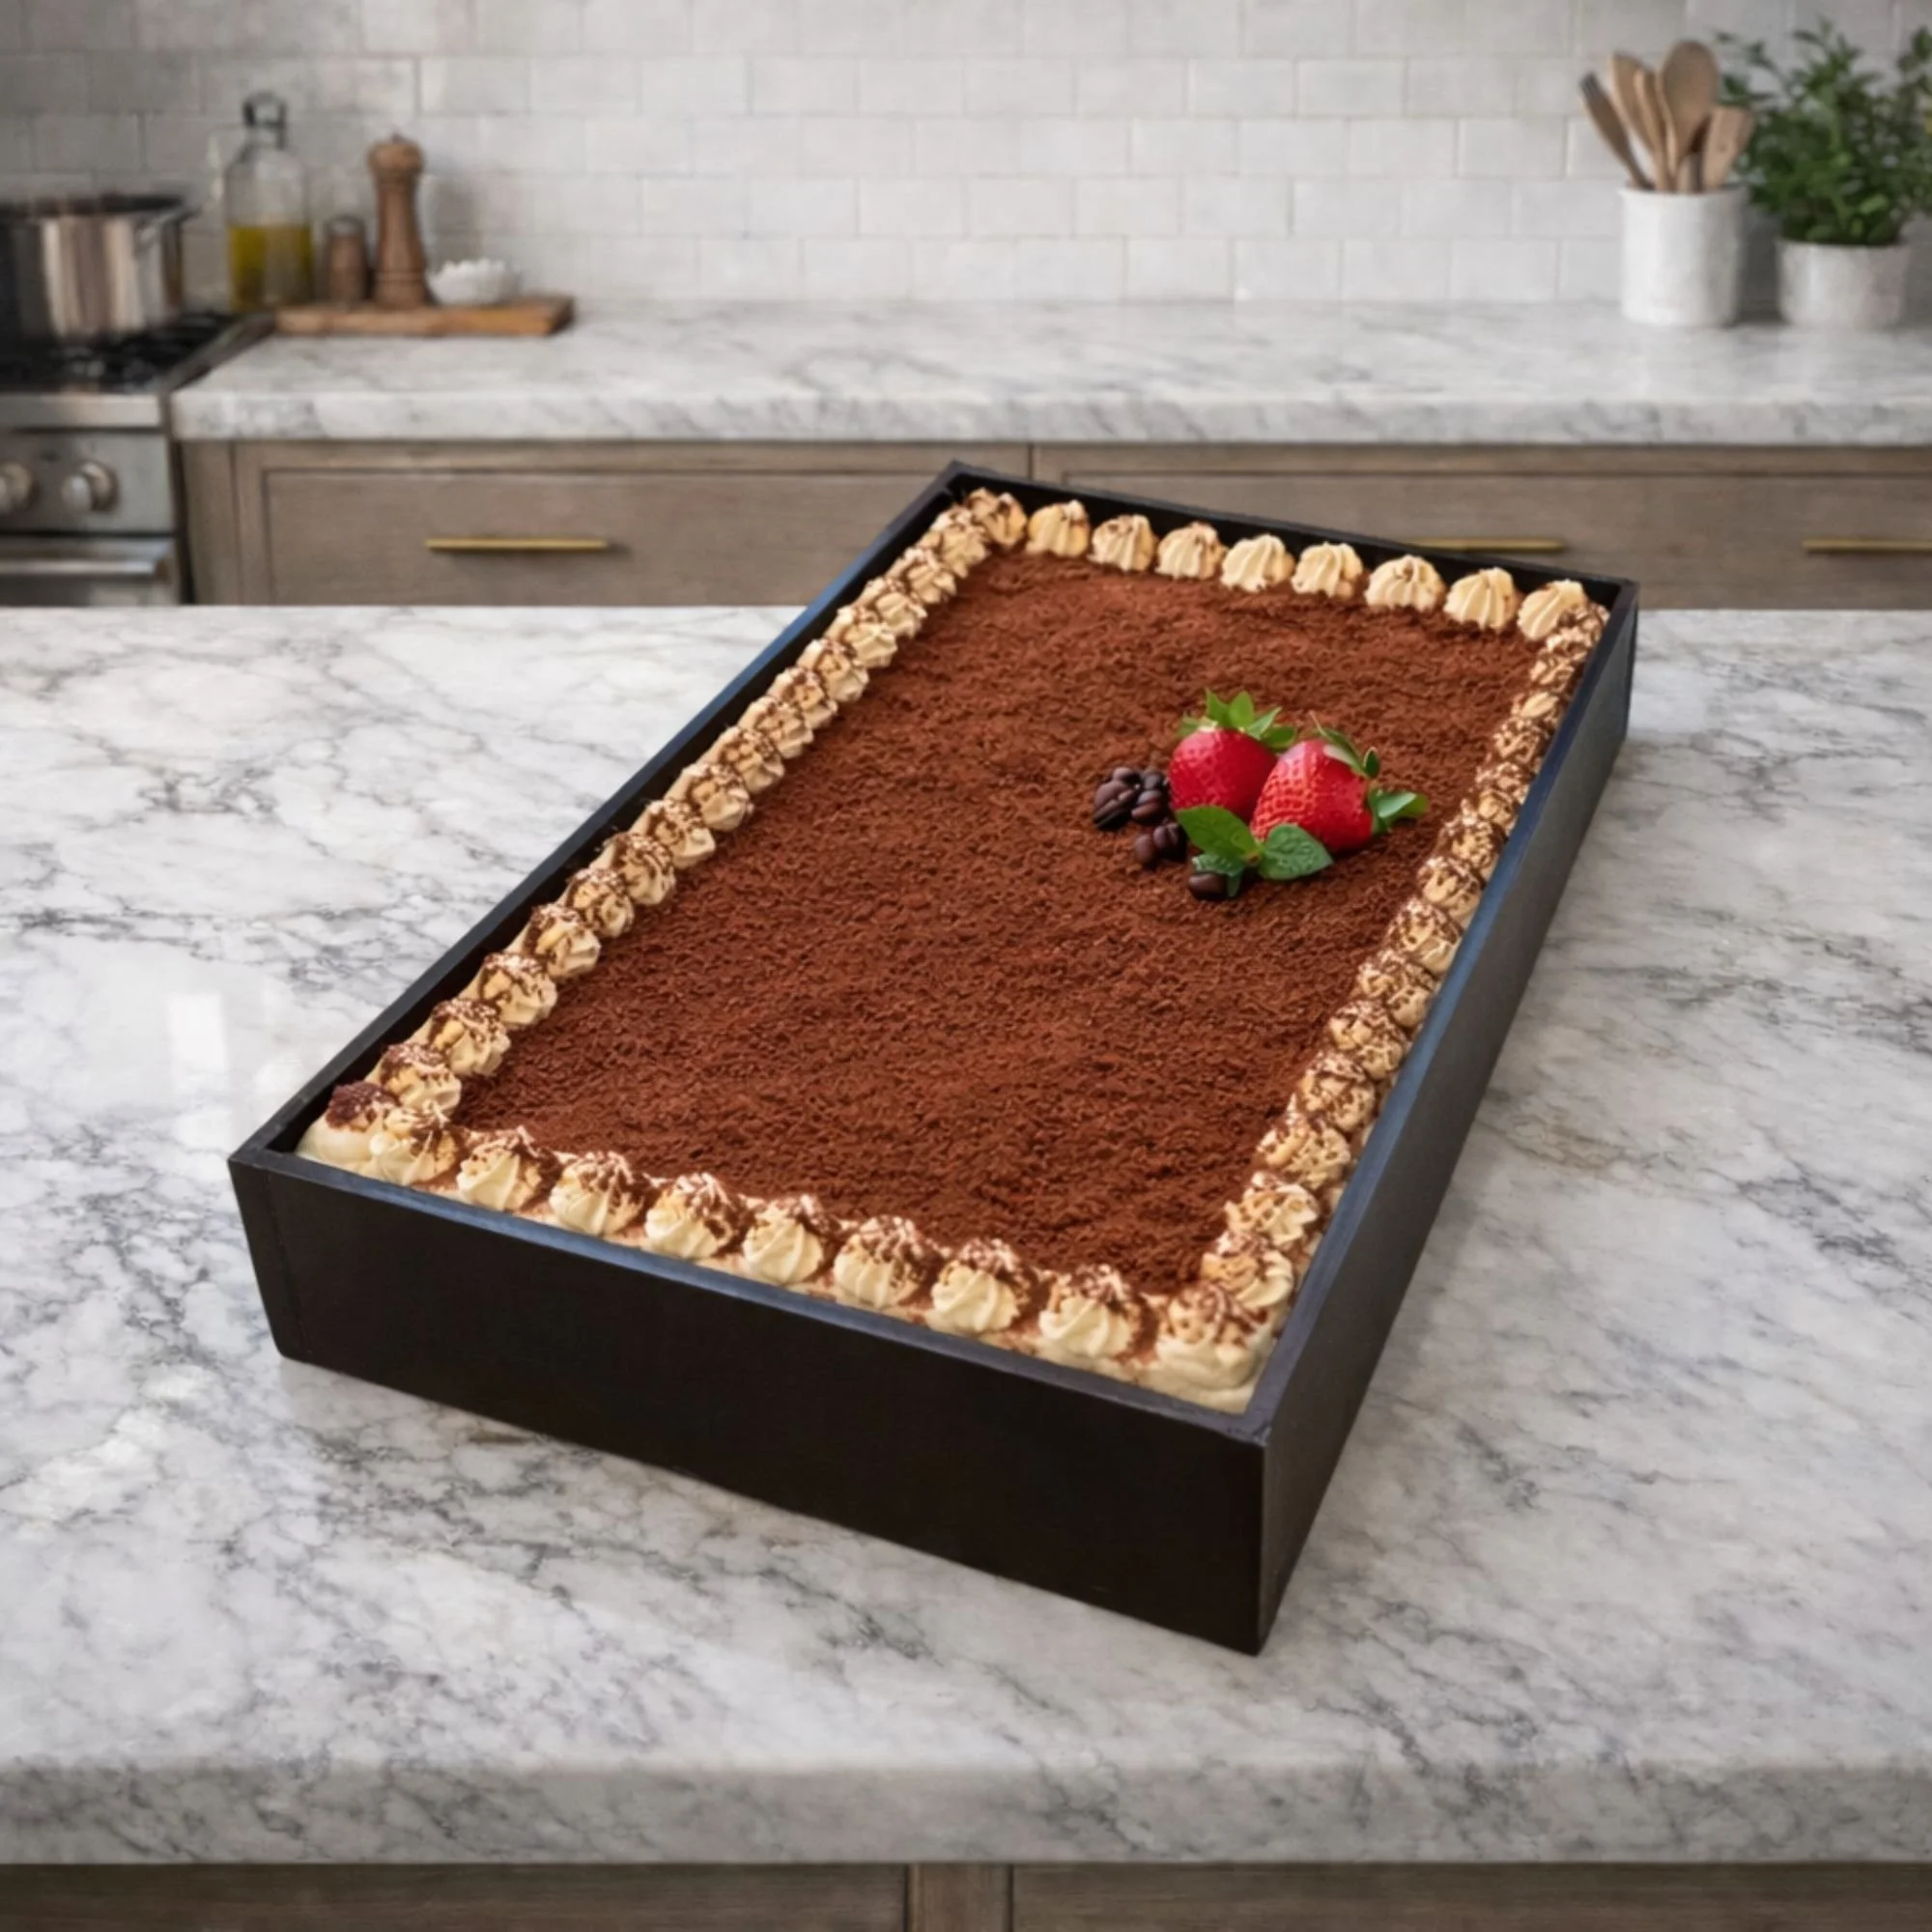
Tiramisu in our 600 × 400 × 80mm black acrylic tray
Why Use a Tiramisu Tray?
Traditional tiramisu is often made in glass dishes, but for large events a large dessert tray offers several advantages.
• Easier to slice evenly
• Better presentation for dessert tables
• Strong and reusable for catering
• Ideal size for large batches
• Great for transport and display
Our Black Acrylic Tiramisu Tray was designed specifically for desserts like tiramisu and layered slices.
👉 View the tray here:
Black Acrylic Tiramisu Tray
Recommended Tray Sizes for Tiramisu
Different tray sizes work well depending on the size of the event or how many servings you need.
Large Catering Tray
600 × 400 × 80 mm
Ideal for:
• Catering events
• Dessert tables
• Large parties
• Restaurant or café desserts
Typical yield from a tray this size:
• 20–24 large slices
• 30–40 medium slices
• 50+ small dessert portions
Medium Tiramisu Tray
250 × 350 × 44 mm
Perfect for:
• Smaller parties
• Family desserts
• Café display trays
• Home baking
Typical yield from this tray size:
• 8–12 large slices
• 12–16 medium slices
• 20+ small dessert pieces
This size is also easier to fit in most household refrigerators while still allowing proper tiramisu layers.
Tip: Line the Tray First
Before assembling the tiramisu, line the tray with baking paper or parchment paper.
This helps with:
• easier slice removal
• cleaner presentation
• protecting the tray surface
• easier cleaning after use
Classic Tiramisu Tray Recipe
Ingredients
• 500g mascarpone cheese
• 300ml thickened cream
• 3 eggs (separated)
• 100g sugar
• 2 packs ladyfinger biscuits
• 2 cups strong coffee (cooled)
• cocoa powder for dusting
Optional extras:
• coffee liqueur
• dark chocolate shavings
Step 1 – Make the Cream Layer
Beat egg yolks with sugar until pale.
Add mascarpone and mix until smooth.
In a separate bowl whip cream until thick.
Fold whipped cream into mascarpone mixture.
Beat egg whites until soft peaks and gently fold in.
Step 2 – Build the Layers
Quickly dip ladyfinger biscuits in coffee.
Lay them across the bottom of the tray.
Spread a layer of mascarpone cream.
Repeat biscuit and cream layers.
Finish with a final layer of cream.
Step 3 – Chill
Refrigerate for at least 4 hours, preferably overnight.
This allows the tiramisu to set and the flavours to develop.
Step 4 – Finish the Dessert
Before serving:
• dust with cocoa powder
• add chocolate shavings (optional)
Slice directly inside the tray for clean presentation.
Perfect for Parties and Catering
Large tiramisu trays are ideal for:
• birthday parties
• weddings
• catering events
• dessert tables
• family gatherings
The tray can also be used for cheesecake slices, brownies, layered desserts, or grazing sweets.
Tiramisu Tray Made in Australia
If you're looking for a strong reusable tray for making tiramisu, our black acrylic tray is designed specifically for this purpose.
It’s large enough for catering desserts while still being easy to clean and reuse.
👉 View the tray here
Black Acrylic Tiramisu Tray
Final Tip
Always make tiramisu the day before your event. The extra chilling time makes the dessert much firmer and improves the flavour.